


Now days everyone is talking about cloud and when it comes to cloud I guess Amazon Web Services (AWS) comes to everyone’s mind at first click. Amazon got wonderful console to manage the whole infrastructure and anyone can create account on Amazon having valid credit card. Don’t worry as you won’t get charged unless you don’t use any service. The very first thing comes to everyone’s mind is Server when it comes to infrastructure and in Amazon world they call it EC2 Instance as far as compute is concerned. So in this article I will be explaining how to create an Instance on Amazon which is pretty much simple and basic step to start up in Amazon. We need to have an account on Amazon which can be created on Amazon Website, credit card details will be required to create an account and it will not get charges unless Amazon services are used.
Once account is created we need login to Amazon Console using your credentials you created during registration followed by these steps:
Once we login to Amazon Services Console, following screen will come up where we need to click on My Account/Console -> AWS Management Console on top right corner.

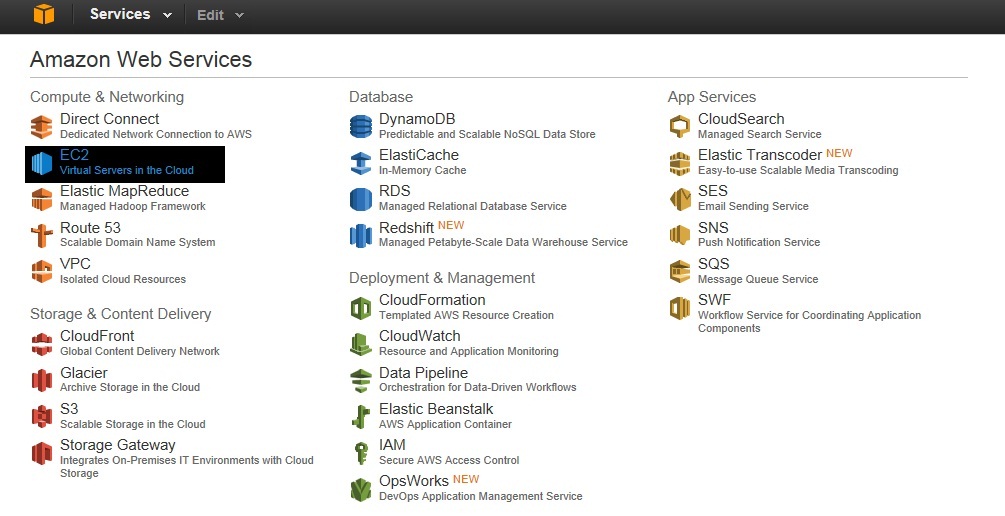
Once we click on AWS Management Console it will take us to following screen where we need to click EC2 under Compute & Networking Section.
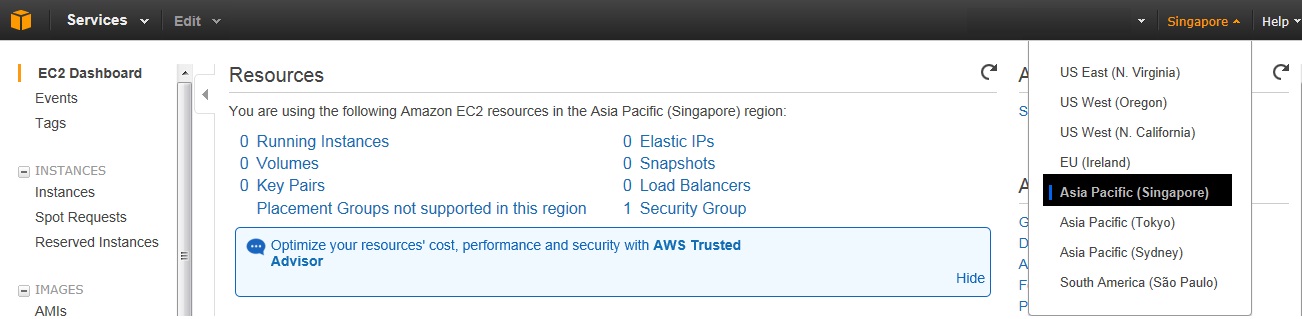
After clicking on EC2 it will take us to EC2 Dashboard where we need to select the region first where our server will reside, it can be selected from top right corner as shown. I have selected Singapore as a region being nearest to India.
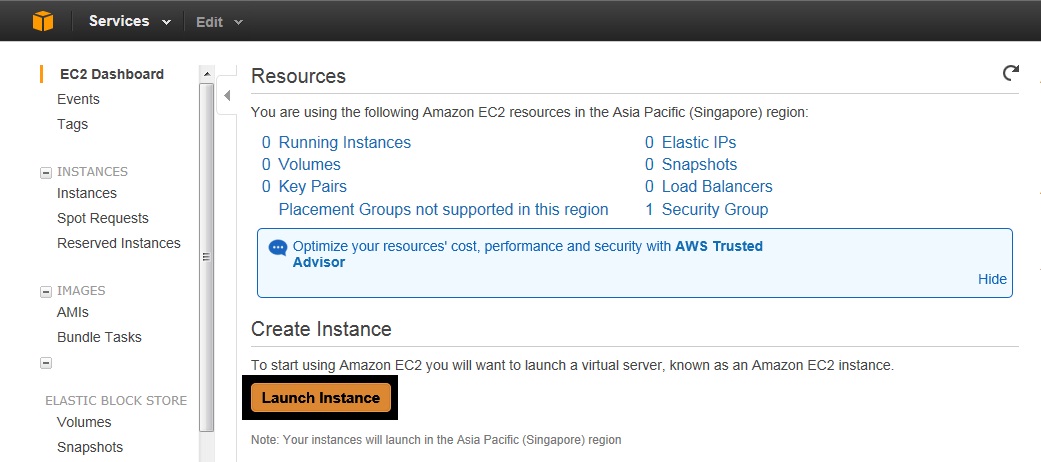
After selecting region we need to click on Launch Instance to create server on cloud.
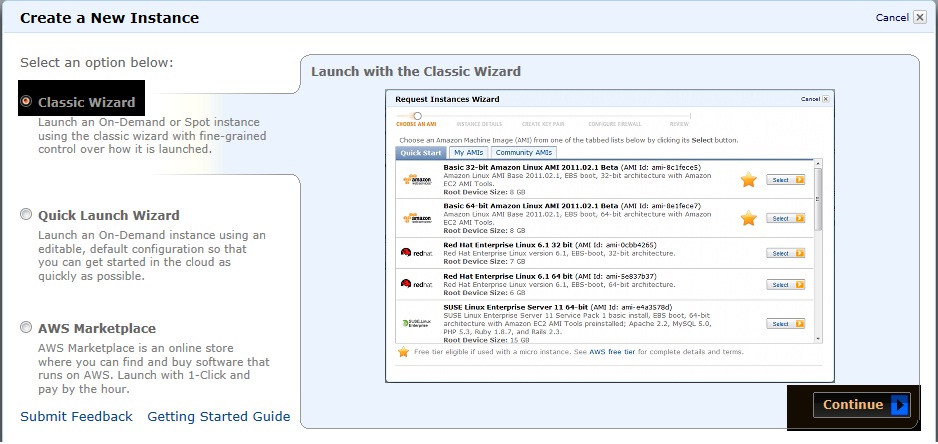
Once we click on Launch Instance it will take us to wizard where we need to select Classic Wizard and click Continue.
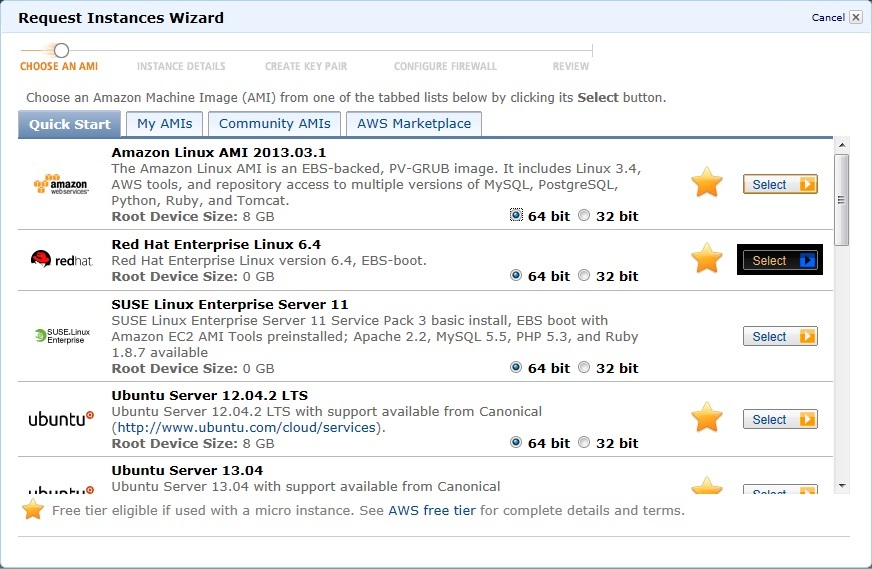
Once we click on Continue we need to Operating System we want on our virtual machine from Quick Start tab. Over here I am taking an example of Red Hat Enterprise Linux 6.4 so we need to select RHEL 6.4 with 64-bit version.
After clicking on Select it will ask us to following screen with several options:
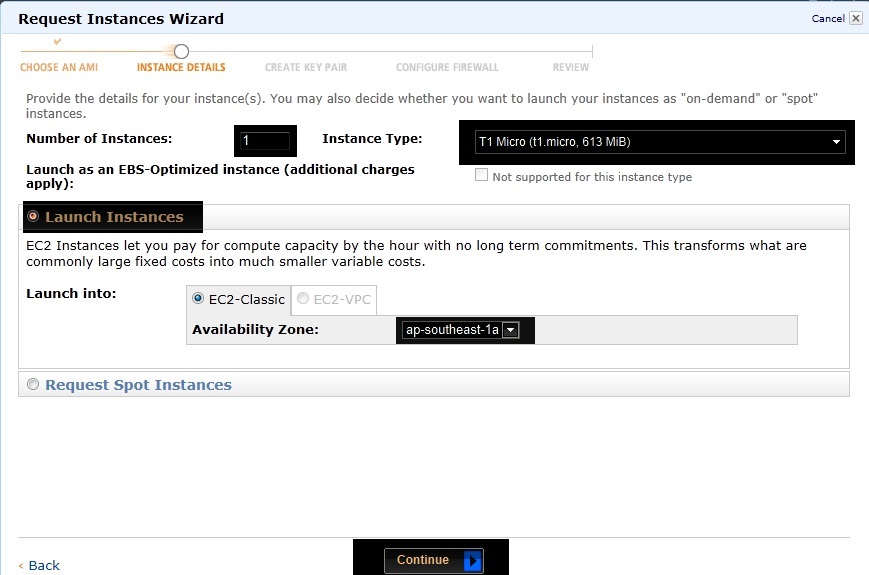
- Number of Instances: Here we need to select number of machines you require, please put 1 as of now.
- Instance Type: Here we need to select Instance type as per your cores and memory requirements. You can get the details on Instance Types on Amazon EC2 Page. I have considered T1 micro as Instance type.
- Launch as an EBS-Optimized Instance: This option is available only when we select minimum Large Instance and EBS-optimized is used when specie IOPS are required from HDD. In our case it is unavailable.
- In Launch Instance: We will get the option of availability zones as per our selected region earlier. We are selecting southeast of Singapore region. We haven’t created any VPC so need not to select that option and it will be disabled by default unless you have VPC created before instance creation.
- Request Spot Instance: This option is based on bid where we can bid for instance and it is based on supply and demand model. The moment any higher bid will come the instance will be given to higher bidder and you will loose the instance. So in our case we will not consider this.
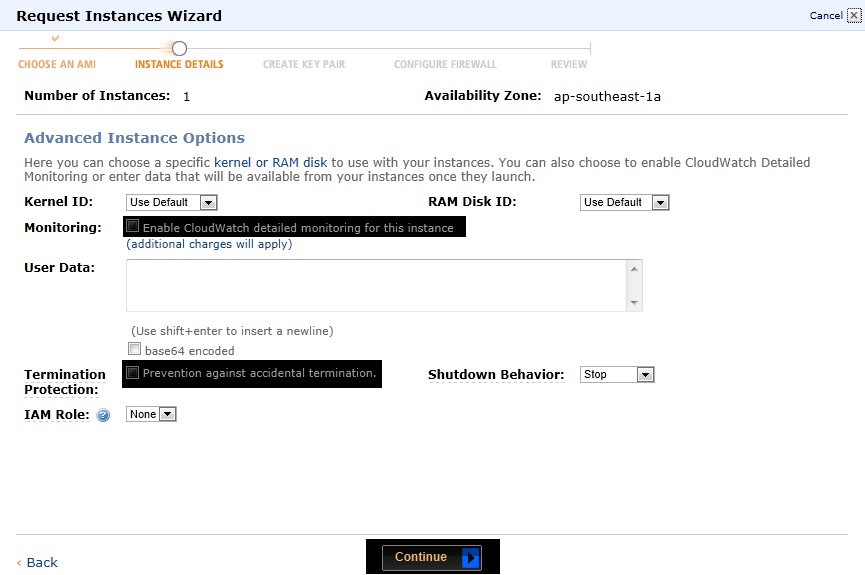
Once we click Continue on above screen it will take us to next screen where we only need to select Termination Protection and Monitoring if required. I have enabled only Termination Protection and I am leaving monitoring unchecked as I don’t require it.
Once we click on Continue, on next screen storage device will show up named as root volume where RHEL is residing.
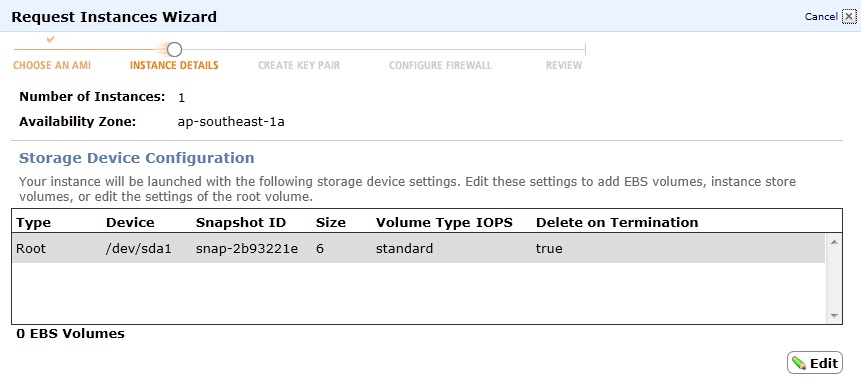
Over here we can either increase the size of root volume and can add extra EBS volume as well if required by clicking on Edit. I am increasing the size of root volume from 6 GB to 20 GB and adding another EBS volume of 30 GB. After doing required changes on Root Volume click on save.

Then we will click on EBS Volume and add 30 GB volume with Standard type. After configuring volume we need to click Add.
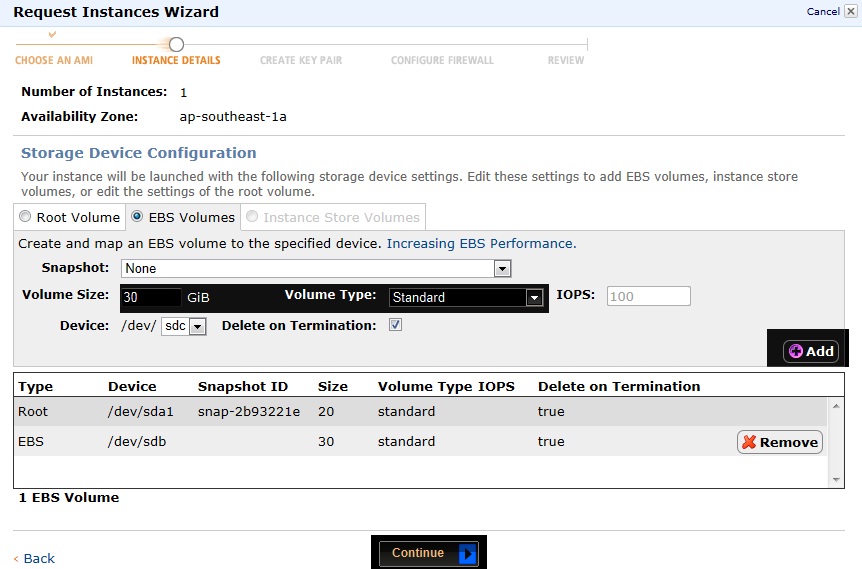
Once we make appropriate changes, click Continue to move forward.
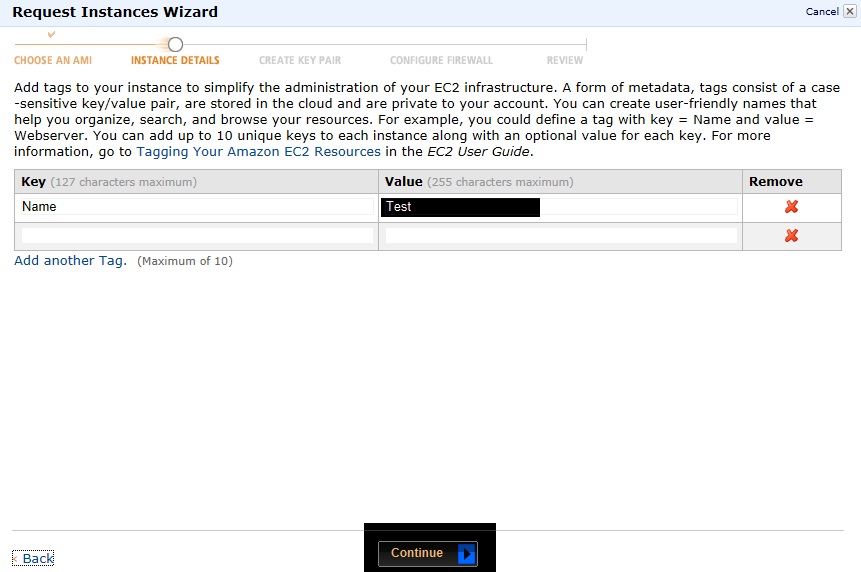
On next screen just give friendly name for your reference so that we can recognize our instance on our dashboard. Over here I have given name as ‘Test’.
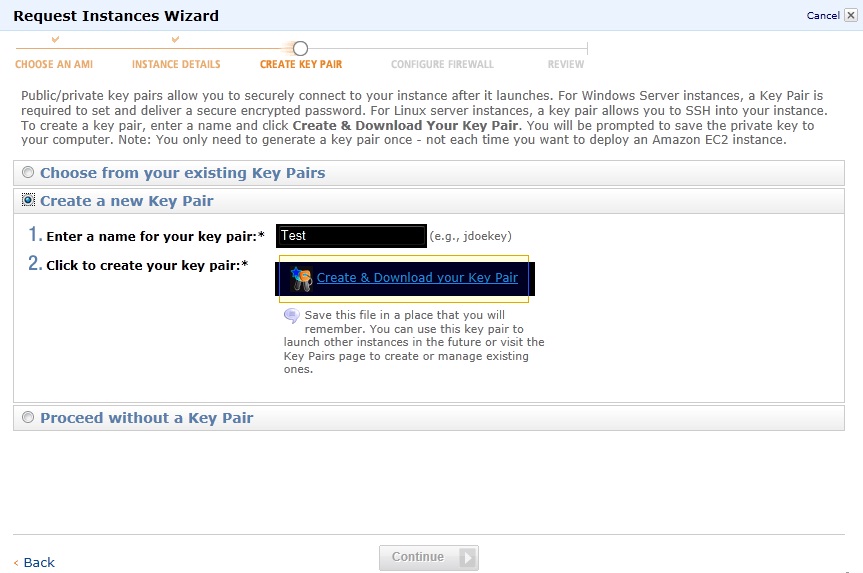
Once clicking on Continue, we will be asked to create Key Pair which will be required to access our instance on cloud. We will create our key pair as it is our first instance and afterwards we can use same key pair for other instances created after this. Enter the name and click on download Key Pair. I have taken name as ‘test’. After downloading the key pair the next screen will show up automatically.
On Next screen we have to configure the firewall ports we want to have access to from outside on this instance. We can create new security group under which we can give ports access required on this instance from anywhere. Port 22 will be there by default as we in Linux access ssh port will be required to take control of instance and we are going to open Port 80 for everyone which can be done as shown:
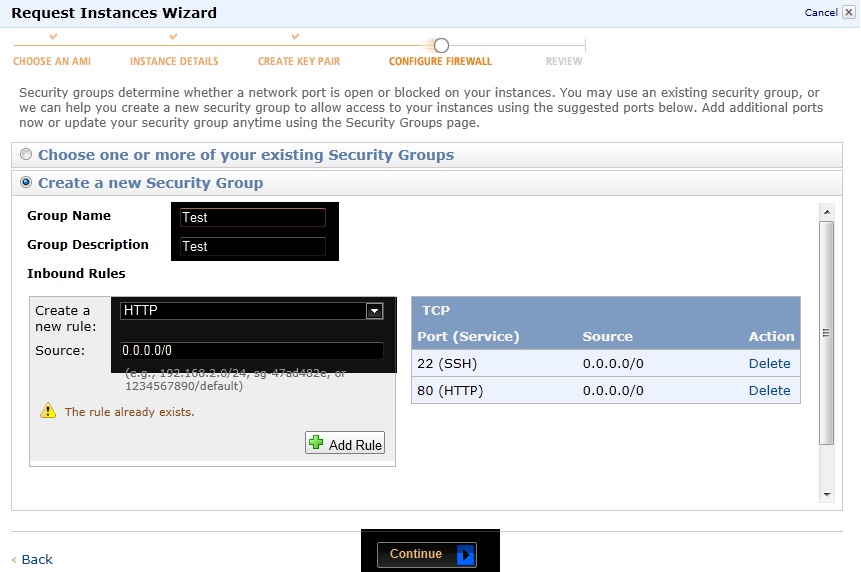
- We will give name as ‘Test’ and description as ‘Test’ as well; it can be any friendly name.
- Select rule from drop down menu and click HTTP as Port 80 is required or otherwise you can write down the port number by choosing Custom TCP rule and mention specific port number.
- If access is open to everyone then give source as 0.0.0.0/0 and click Add Rule.
- After clicking on add hit continue to go to next screen.
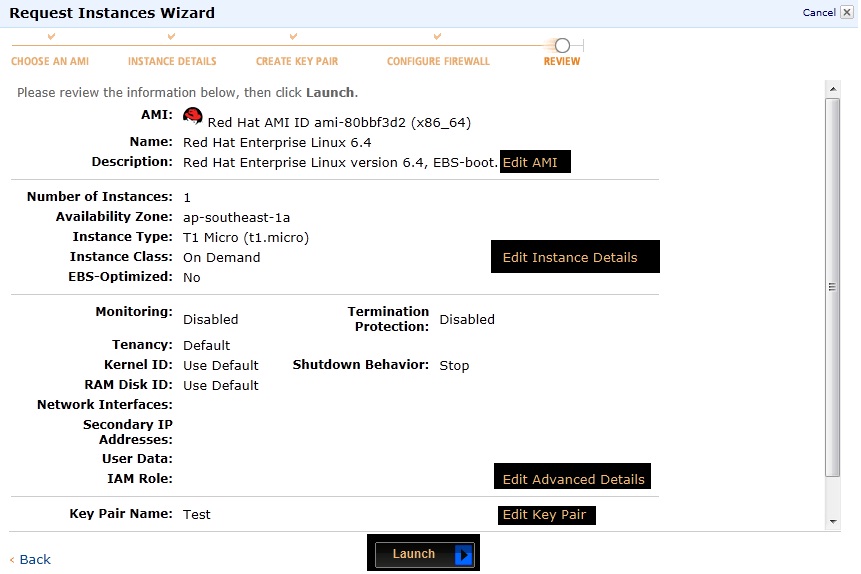
On this last screen we can check the configuration once again and if any change is required go back to required section otherwise click Launch.
Click on Close on next screen to initiate the launching process.
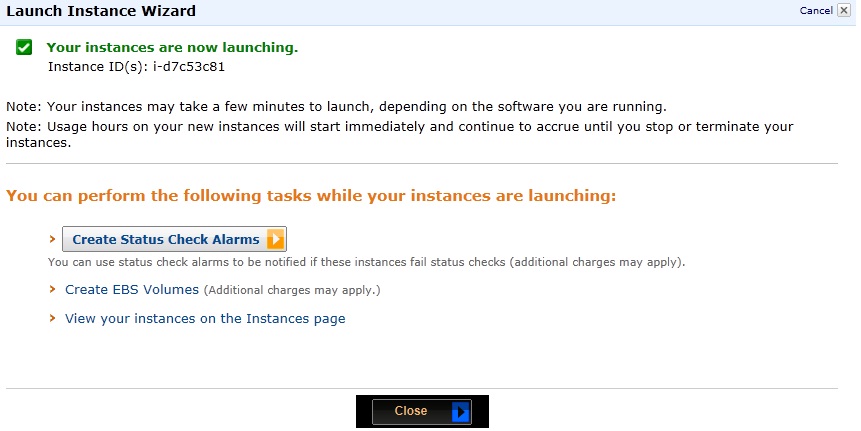
After clicking on Close the following dashboard will show up with our instance showing up in the list and it will take 5-6 minutes to launch our instance. So please be patience and wait till State is Green along with Status Checks as Passed.
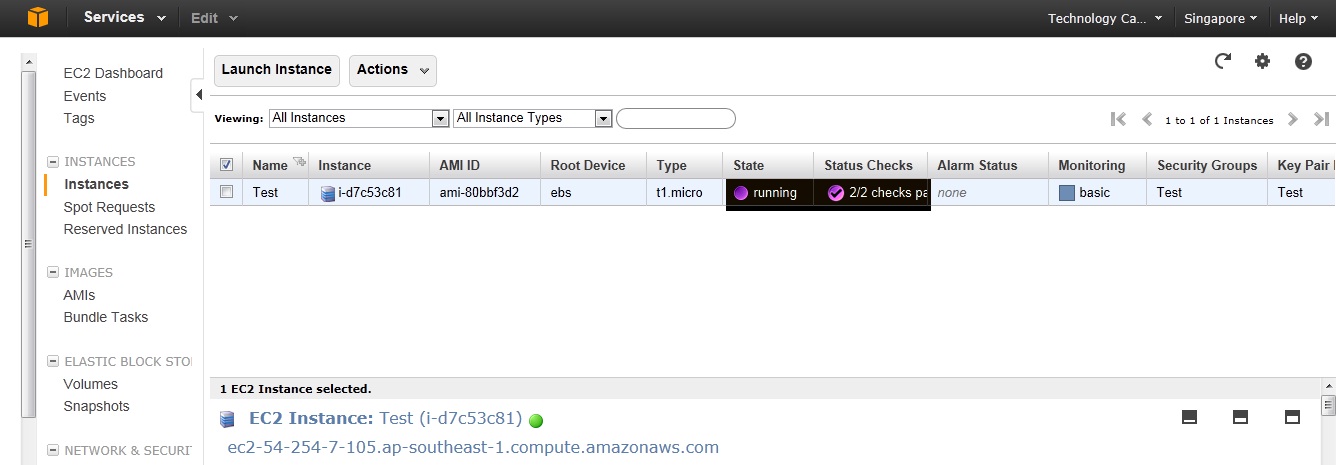
Now our instance is launched and running, we can also assign Static IP Address (Public IP) through which it will be accessible from outside word.
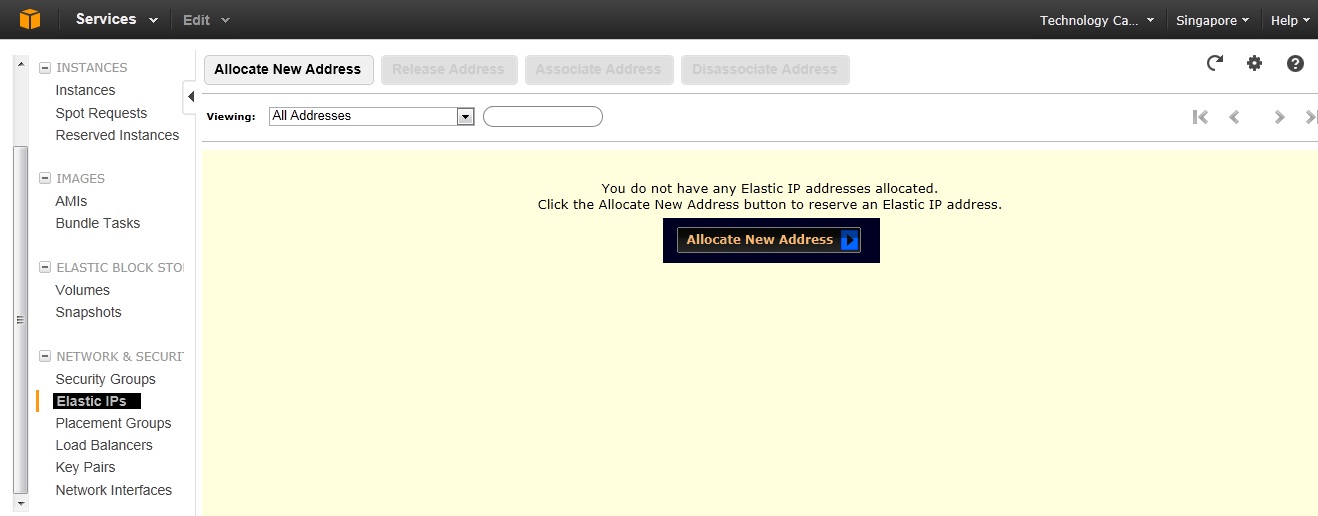
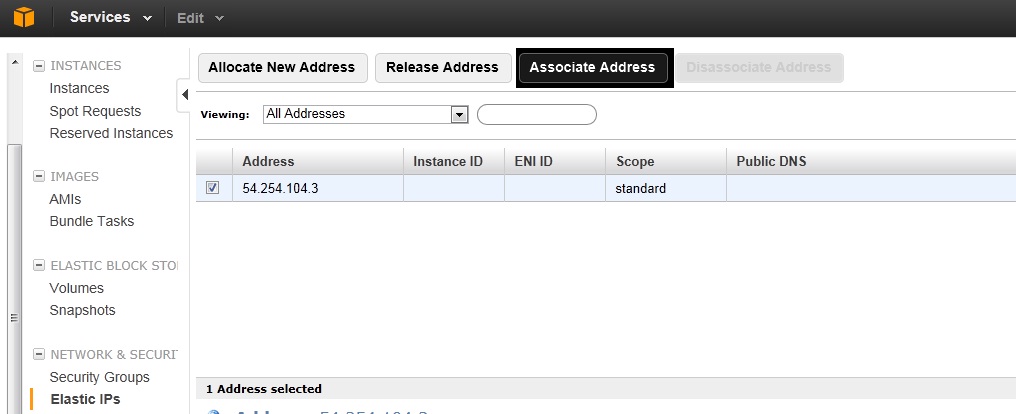
Click on Elastic IPs on left hand side of the screen on menu and then click Allocate New Address.
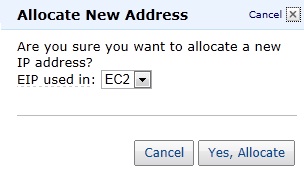
Once we click on Allocate New Address, it will ask for confirmation where we have to select EC2 and click Yes, Allocate.
Once address is allocated to us we have allocate the address to our instance will be done by clicking on Associate Address.
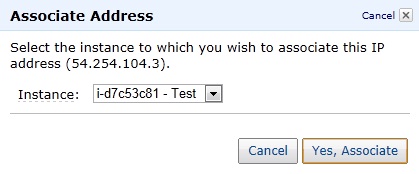
After we click on Associate Address it will ask us to select the Instance, select instance and click associate.
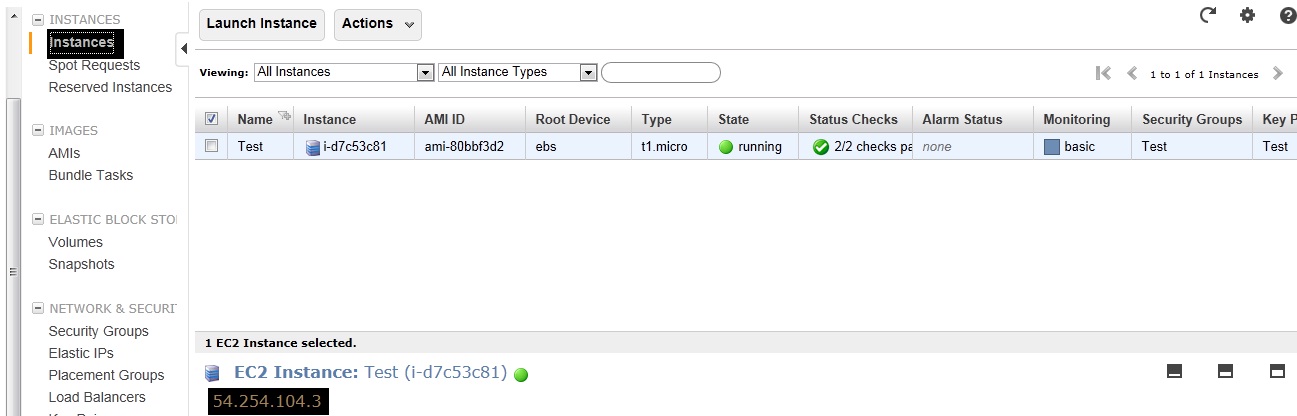
Now once we click Instances on left hand side menu to check out instance list it will show Elastic IP (Public IP) whereas earlier it was showing internal DNS address on Instance List before attaching Elastic IP to it.
This completes our tutorial. Now to access the Instance from your computer using the key pair we downloaded during Instance creation please refer this POST


 comes to everyone’s mind at first click. Amazon got wonderful console to manage the whole infrastructure and anyone can create account on Amazon having valid credit card. Don’t worry as you won’t get charged unless you don’t use any service. The very first thing comes to everyone’s mind is Server when it comes to infrastructure and in Amazon world they call it EC2 Instance as far as compute is concerned. So in this article I will be explaining how to create an Instance on Amazon which is pretty much simple and basic step to start up in Amazon. We need to have an account on Amazon which can be created on Amazon Website, credit card details will be required to create an account and it will not get charges unless Amazon services are used.)